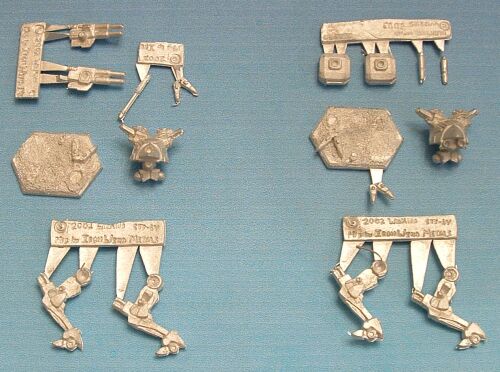
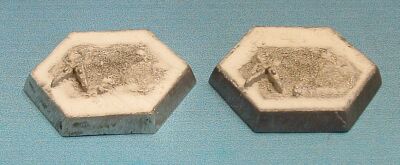
| I wanted to experiment with positions of base inserts (with attached
foot) to see how they would work with my poses. Inserts were epoxied
in place and the gaps filled with Elmer's Redi-Spack Lite. It's a
non-shrinking spackle that I use as a cheaper alternative to filling bases
with epoxy putty. Let it all set for 30 minutes. |
 |
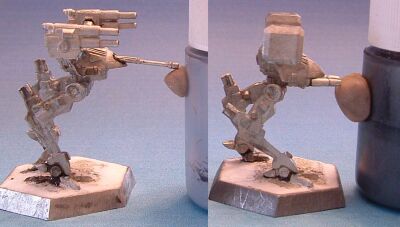
| Dry fit the legs and torso to make sure the alignment will keep the
torso centered on the base (from side to side). Then epoxy the legs
into the position you like. 5M will be leaning forward on the right
leg, 5V's foot will be flat. Hold the position with putty and let
cure for 30 minutes minimum. |
 |
| Attach torsos to the legs, being very careful with the legs.
They were too far inward on the hex base to use a paint bottle for support,
so I made one out of putty instead. Allow at least 30 minutes to
cure. (I was working on these and the Thunderbolt 9M at the same time,
and this is where I let them sit overnight.) |
 |
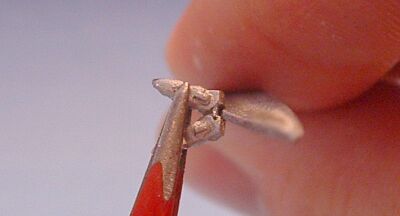
| When dry fitting the 5V's left leg, I decided that I needed to file
a small notch into the forward toe piece so that it fit closer to the ankle. |
 |
| I then epoxied the toes to the leg, using the top of a paint bottle
and putty for support so I could set it off to the side. |
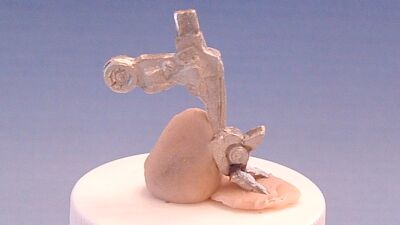 |
| Find a location for the 5M's left toe piece by dry fitting the leg.
I used a mechanical pencil to mark the spot, just in case. Then epoxy
the piece to the base. |
 |
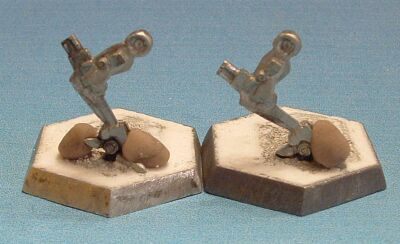
| Once the legs and toes have cured, attach them to the hip ball and
base (or other toes). Use putty to hold them at both ends if necessary--only
one spot was required here for each. Allow 30 minutes to cure. |
 |
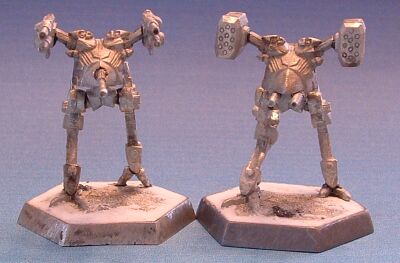
| Using the old stand-by of paint bottles and putty, dry fit the arms.
When they are in a position you like, slide them apart, apply epoxy to
the sockets, and slide them back together. Allow 30 minutes to cure. |
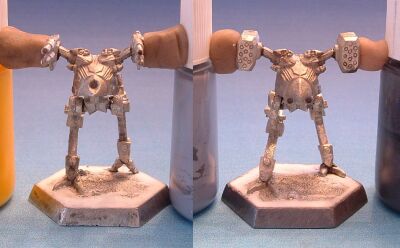 |
| Attach the laser barrels with epoxy and steady them with putty and
a paint jar until it cures. |
 |
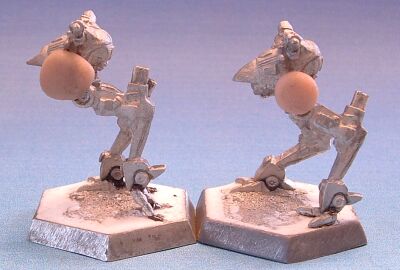
| Here are the finished assemblies. Halfway through the process
I noticed the 5M was not going to be centered well on the base (front to
back)... |
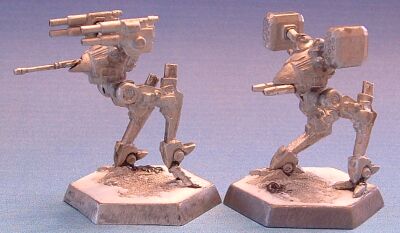 |
| ...nor from side to side. It's nothing horrible, but next time
the insert is going all the way back in the base for this type of pose.
The 5V turned out damn-near perfect. |
 |
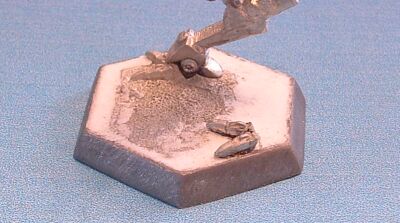
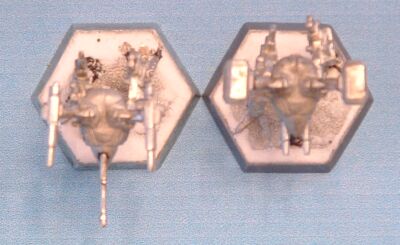
| An overhead look to show what I mean about centering. The 5M
has its most delicate parts protruding way forward of the hexbase.
If not careful they could get damaged in storage or gaming. The 5V
fits exactly though. |
 |