Assembling the MAD-5R or 9S Marauder Miniature  (IWM #20-264)
This pack contains the parts necessary for either the MAD-5R or 9S.


tools used-
  • exacto knife
  • needle files
  • Sculpey III (or any other putty/clay)
  • JB Weld (or JB Kwik) epoxy
  • toothpick (for mixing and applying epoxy)
  • white vinegar
  • toothbrush
  • paint bottles (for support structures)
  • blue/yellow "green stuff" epoxy putty (or your choice of base filler material)

 
Here are the parts included in the blister:

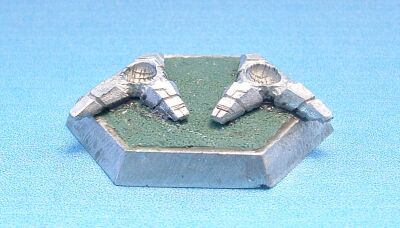
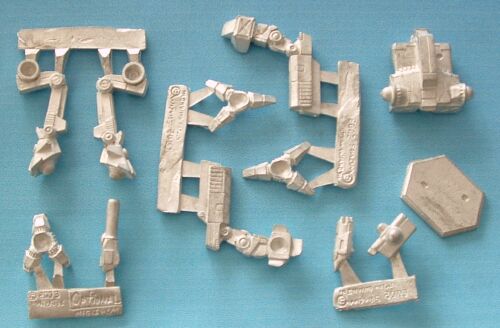
(11 pieces including an optional foot and weapon barrel.)


Begin by preparing all parts for assembly. Cut them from the sprues, clean up mold lines with the exacto and needle files. Score all joints with the exacto knife.  When finished, scrub the parts with the white vinegar and toothbrush.

Epoxy the insert into the hexbase.  If your normal base filler is somewhat flimsy (spackle, white glue, etc.) you'll want the insert centered where you plan to attach the feet.  I covered the insert with a thin layer of green stuff in order to keep a uniform texture. 

Epoxy the feet into position. Dry-fit them with the legs and torso to get a general idea where you want them aligned.

Attach the left leg, supporting it with putty or clay while it cures.  This is an important structure so allow at least 30 minutes.
While the leg is curing, attach the gun barrel to the torso.  I chose the gauss rifle for this to make the 9S variant.  Nothing wrong with the RAC, it's just that my dice rolling sucks.
Epoxy the hip assembly into position and hold with putty.  Dry fit the right leg to make sure alignment is perfect.  (Using epoxy rather than super-glue allows time to tweak the position.)  Again allow over 30 minutes to cure.
Epoxy the hip and ankle sockets and put the right leg into place.  Secure with putty just in case it wants to twist a bit.  Allow another 30+ minutes to cure.
Now you can attach the upper torso.
Putty the arms to the sides of paint bottles and line them up with the shoulders.  When alignment is perfect slide the bottles out, apply epoxy to the sockets, and slide the bottles back into place.

Let the whole works cure like this overnight if you can.  I let mine go half a day--assembled before lunch, cured until bed-time.  You can tell by the difference in lighting.

Here's the final assembly.  This will get scrubbed with white vinegar before priming and painting in order to remove the oils and residue picked up during assembly.


Main Page
Assembly Index